Hello every one! Merry Christmas! I hope you all had a nice family time and the hand made gift, you probably gave to people you love, got really apreciated. I've always been really curious about that. I imagine people look very excited when we offer them a hand made gift and then, when they are alone, they would be observing our masterpieces with curiosity! Haha!
I'm copying here my "How to narrow an one-piece waistband of a ready made pant" tutorial, to have them all together, under the "tutorials" tab.
1. I always have been narrowing the waist of the pants I buy, because I have a narrow waist and wide hips. The result wasn't always the best, usually depending on the fabric or how long my top was going to be...to cover up the waistband... Now I believe I've got it! See if the waistband is one piece, there's no guide-seam to follow or an easy way to add darts if needed. I hope I'll help you guys. It worked for me!
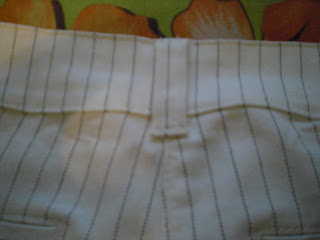
This is how it looks at first.
2. Firstly, undo the seam of the waistband right where the centre back seam of the pants is (take away the belt keeper if there's any) and cut the waistband right in half. I wanted to narrow the waist band 4 cm, so cutting it in the middle works just fine. Make sure to try on the pants first and measure the excess fabric!
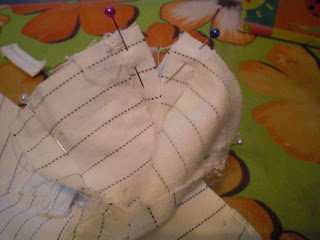
3. Now pin together the four pieces of the waistband and sew them, according to your measurement. You may undo only the stitch of the waistband that holds it to the pants and not the seam that holds the two pieces of the waistband together. I had to do it in this pants, otherwise it is easier to treat it as one piece.
4. Cut the extra fabric and leave about one cm for seam allowance. Steam press open and give the waistband it's normal shape.
5. Now you have to narrow the pants part too. Pin and stitch, creating a dart. I started at 2 cm (2+2 =4 cm narrower) as I did in the waistband and ended at 0.... it's a dart!
If you have to get rid of a lot of fabric, more than 6 cm, you better do this: follow steps 2-5 as above and in step 5, instead of making one big dart in the center seam of the pants, you should do two smaller ones, right in the center of every pant part.
So if you have to narrow your waist in 8 cm, narrow your waist band following steps 2-4. Then divide 8 by 2 =4, so you have to make two darts of 4 cm each, which means 4 divided by 2 =2, each side of the dart has to be 2cm. Measure the upper part of your pant part, note down the center and draw a dart, 2cm on one side of the center, 2cm on the other side. Sew carefully ending to 0cm. Repeat that to the other side of the dart.
6. Most of the work is done! Add any decorative stitches if your pants originally had them. Now sew the waistband to the pants.
You're done! It looks as it did at first, but it's not the same...look at the lines!!! Good luck!
See you around
Maria
I wish you all a Happy and Creative New Year!
I wish you all a Happy and Creative New Year!


2 comments:
This is very useful! Thanks for sharing!
Very helpful! I'm so tired of wearing my pants with the 'moat' around my belly. I am definitely going to try this! Thanks for sharing this idea!
Post a Comment